Working with the Precision Alignment Tool
The purpose of the precision alignment tool (PAT for short) is to help
you precisely position, size, and crop multiple images, and to do so quickly
and easily.
Working with PAT, at least initially, is probably the least intuitive
aspect of using Easel. On the other hand, getting the hang of it isn't
that hard and is worth it. PAT packs a lot of power into a few clicks
of the mouse, and once you have mastered it, you will be impressed with
your composing precision and productivity.
The reason PAT is a bit complicated is because a) you can't resize just
one dimension of an image without either distorting it or cropping it,
b) as you try to fit multiple images closely together in a collage, you'll
find yourself constantly repositioning, resizing and recropping, and c)
PAT combines all of the functionality needed to do so into a very compact
interface.
 PAT's interface consists of the image at left: a 64x64
pixel square with inner and outer sets of arrows pointing North, South,
East, and West, and Northeast, Southeast, Southwest, and Northwest. When
the key is held down, the NE, SE, SW,
and NW arrows in the inner ring disappear. When the cursor is positioned
over any arrow, a tooltip describes its function, as shown below.
PAT's interface consists of the image at left: a 64x64
pixel square with inner and outer sets of arrows pointing North, South,
East, and West, and Northeast, Southeast, Southwest, and Northwest. When
the key is held down, the NE, SE, SW,
and NW arrows in the inner ring disappear. When the cursor is positioned
over any arrow, a tooltip describes its function, as shown below.
Getting Started
To activate PAT, turn it on by selecting on the main menu, or by double clicking anywhere
on Easel's main window. Once turned on, PAT stays on until turned off,
which is also done by double clicking or selecting . When turned on, the menu item is checked and
appears. When the cursor moves over an image in the composition, PAT centers
its interface on the image and leaves it there until the cursor moves
over another image.
To use PAT, click on one its arrows, then, per instructions that appear
in the status bar, click on one or two "destinations." When
you click one of the N/S/E/W arrows, you will be instructed to click on
one destination, to designate the image edge (or margin) that PAT will
reference to move, crop, or resize the current image. When you click one
of the NE/SE/SW/NW arrows, you will be instructed to click on two.
How does PAT determine which edge of a target image is the one to align
with? It depends on the position of the image to be modified relative
to the target, as shown in the picture. PAT will select the first edge
encountered while moving in the selected direction. Thus if you told PAT
to move image A to the right and then clicked on image B, it would align
with the left edge of B. If you clicked on image C, however, it would
align with the right edge, because the right edge of A is already to the
right of the left edge of C. Got it?
Tip: Sometimes, you will want
to reposition an image manually before having PAT do its thing; in the
example just shown, for instance, if you wanted to align with the left
edge of C instead of the right, you would first need to drag A entirely
to the left of C. To do so, you don't need to turn PAT off; just position
the cursor in PAT's central square, hold down the left button, and drag.
One last thing relevant to all PAT functions is inter-image
spacing, which you can adjust by selecting
from the main menu. The values you enter here are used by PAT to enforce
uniform spacing between images. If, in the example above, horizontal spacing
was set to 10 pixels, PAT would move the right edge of A to 10 pixels
to the left of the left edge of B. Note, though, that spacing would have
no effect when aligning A to the right edge of C.
Moving an Image
Using PAT to move an image is simple: move the cursor over the image
to be moved, click one of PAT's outer arrows, then click the destination
image(s) or margin(s) that you want it to align with.
Resizing an Image
Using PAT to resize an image is also simple, though explaining the outcome
is a bit more complicated. First, note that since you can't alter the
aspect of a picture without distorting or cropping it, there are only
4 resize arrows instead of 8; when PAT resizes one dimension of the image
to align in the selected direction, it will also resize the other dimension
proportionately. Second, the direction you select for resizing determines
which corner of the image will remain anchored while the other three move.
Consider the example shown, with images A-D, and B the one to be resized.
If you hold down the key and click the
inner right arrow and then image C, B will resize as shown by the blue
dotted line. If you click the inner down arrow and image D instead, you
get the red line; note that B now covers up part of C. In both cases,
corner 1 remains anchored. If you clicked the inner left arrow and then
image A, however, corner 2 remains anchored as B resizes to the green
line.
Because you have no control over the second dimension of the resized
image, resizing with PAT is most useful in cases where you want to align
the image in one dimension and have room to spare in the other.
Cropping an Image
Last but not least is automated cropping, when you command PAT to fit
an image into a space that has a different .
PAT does so by calculating this ratio, then doing the least possible cropping
while working from the center of the image as displayed (i.e.,
if the image is already cropped, PAT works from the center of the current
cropping rectangle, not the entire image), and finally, resizes the result
to fit the space. Moreover, because PAT reproportions the image on the
fly, it can change one or both dimensions simultaneously; thus you get
8 arrows again:
Cropping Examples
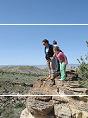
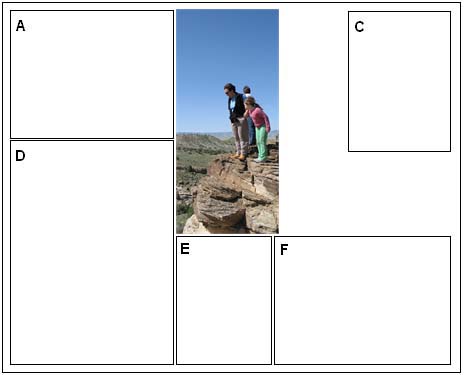
Consider image B in this example:
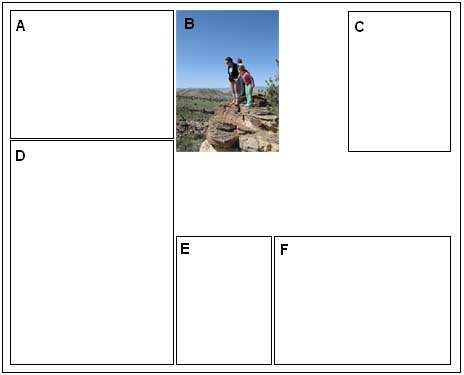
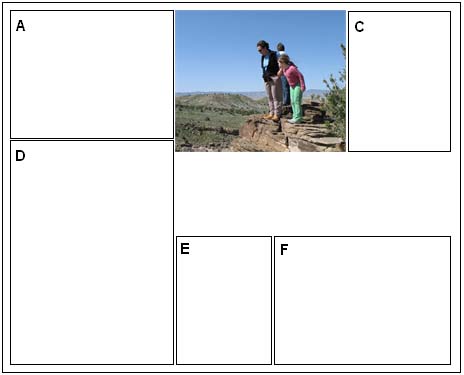
If we drag PAT onto B and click the inner right arrow and then image
C, PAT crops horizontally around B's center line like this:
and maintains the same image height, to create this composition. Incidentally,
at this point you might want to use PAT to align the bottoms of B and
C with A, which would take 4 clicks (PAT on B, click inner down then A,
PAT on C, click inner down then A or B).
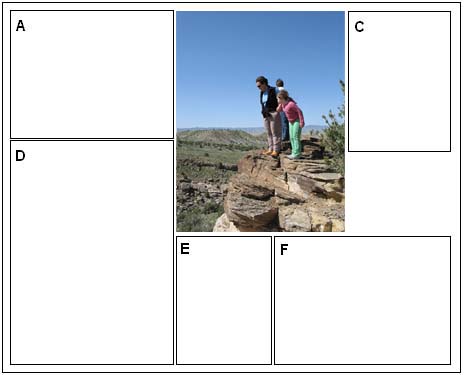
If, instead of cropping horizontally, we click the inner down
arrow and image E, PAT crops vertically around B's center line like this:
and maintains image width, for this result (and here you might want
to use PAT to crop B to align vertically with E -- PAT on B, click inner
right arrow then E):
Finally, we can click the SE (right-down) arrow and both image C and
E. You might expect to get a combination of the previous 2 crops, but
PAT doesn't work that way; it just computes the aspect ratio of the space
and performs the minimal crop, which happens to be:
with this result (can you figure out the 2 clicks needed to have PAT
crop C to fill in the final hole?).
If you are already familiar with fill-the-hole
cropping, you may recognize strong similarities between it and PAT
compound cropping (by compound I mean use of the diagonal arrows to resize
in both dimensions). FTH cropping is more powerful, but PAT cropping is
more automated and hence faster.
See Example 1 for a
more detailed and complete example of using PAT.
Closing Thoughts
For many reasons, arranging multiple images into an intricate collage
is a challenging task, and it motivated me to create both Easel and PAT.
Getting a satisfactory result requires both artistic judgement and what
can feel like endless resizing, cropping, and moving, not to mention a
degree of precision that a computer mouse is hard-pressed to support.
Until you have tried to do this, PAT and its various capabilities may
seem a little strange and unnecessary. Once you do it, however, and have
gotten PAT-proficient, you will be able to size, crop, and assemble images
with such speed and precision that you will be pleased, maybe even a little
amazed. PAT is one of those things that you really need to use to appreciate
fully.